Master the art of precision sectioning with our adjustable finger parting tool - your scalp and hair will thank you.
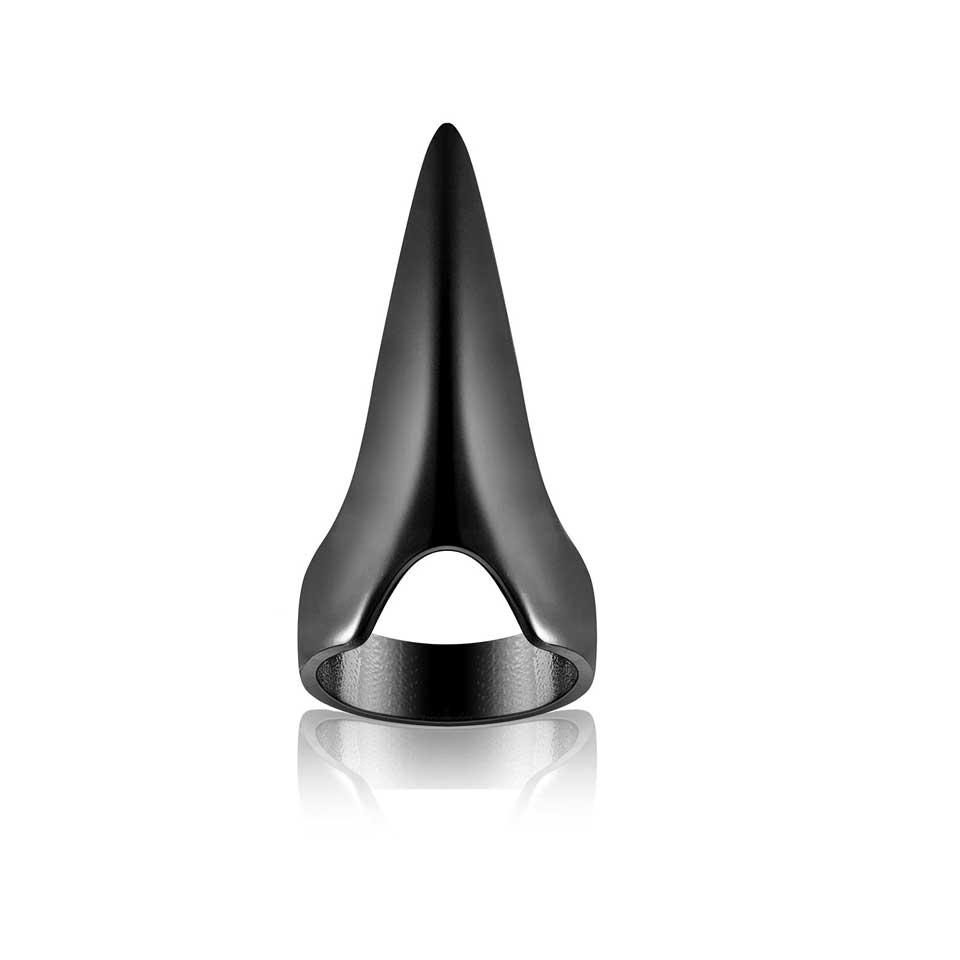
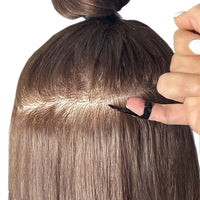
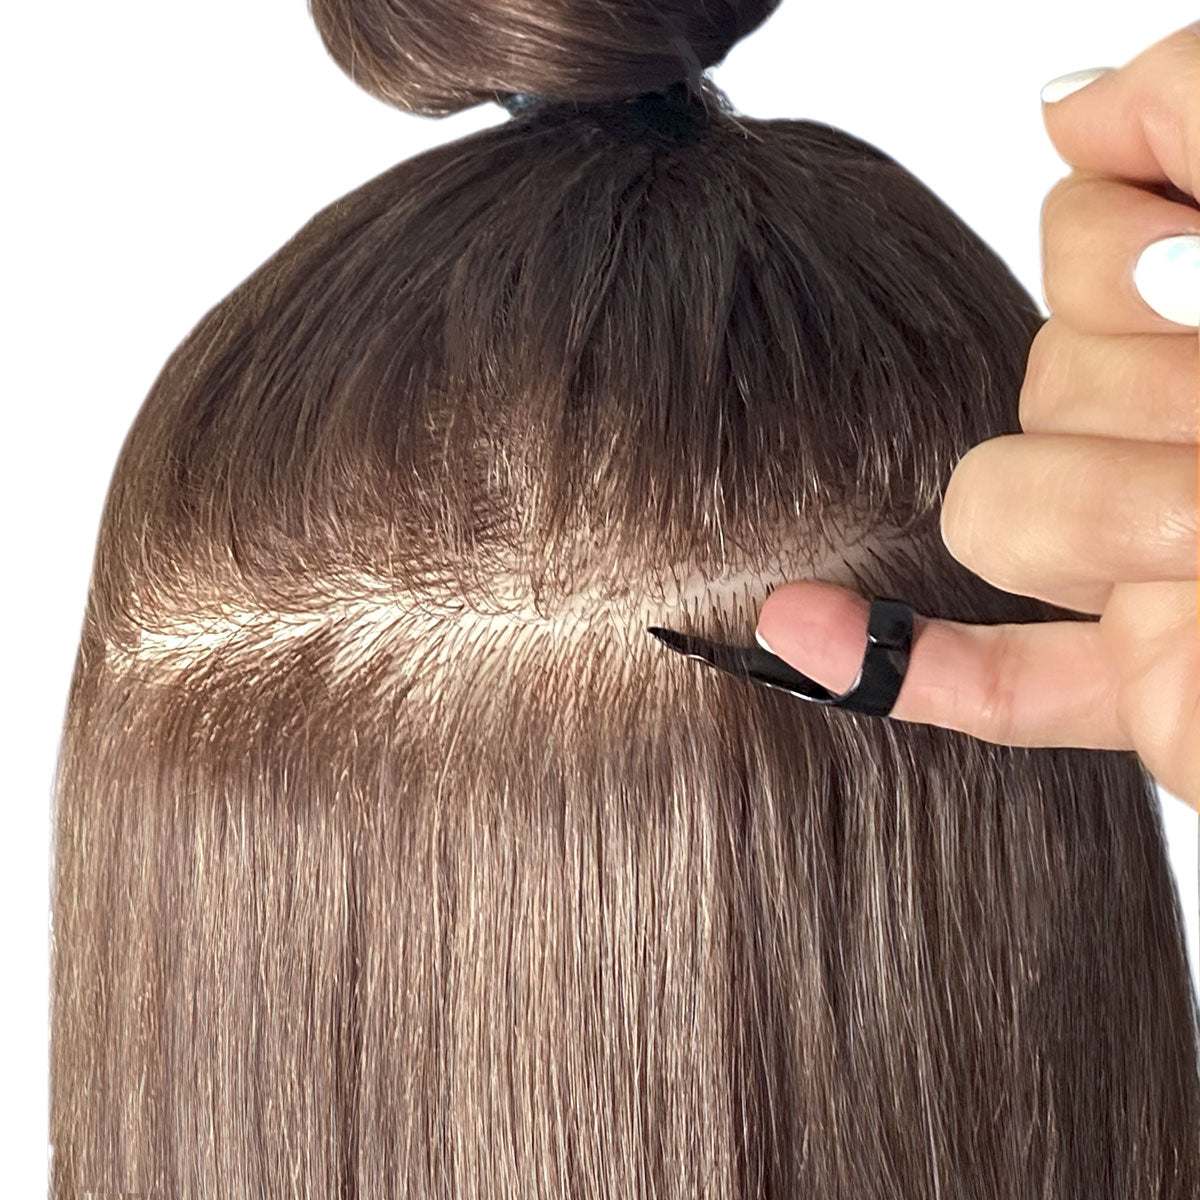
The Hair Parting Tool is an innovative finger parting tool that provides unparalleled precision and adjustability for sectioning the hair with ease. With its proprietary design, this versatile tool allows you to accurately part your hair into neat and well-organized sections, giving you more control over your styling routine while reducing the appearance of scalp show-through.
In addition to providing a precise styling experience, the Hair Parting Tool also possesses unique features that help protect against potential hair loss. Its adjustable grip ensures even tension on all parts of your scalp while minimising any pressure points that could cause breakage or thinning over time.
Whether you are a professional stylist or someone who simply wants easy-to-use tools in their arsenal at home, our Finger Parting Tool will offer solutions to all kinds of hair types & lengths. So grab one today and bring out the best in yourself!
- Achieve precision and accuracy in hair sectioning with the Hair Parting Tool Finger Parting Tool, minimising errors and ensuring a consistent result every time
- The adjustability of this tool allows for customization to fit any scalp size or hair type, making it versatile for all hairstyling needs
- By using this tool instead of your fingers, you can reduce tension on your scalp and minimise the risk of hair loss due to excessive pulling or tugging
- With its innovative design and functionality, the Hair Parting Tool Finger Parting Tool is an essential addition to any professional hairstylist's toolkit or at-home styling routine
The ring tool is incredibly convenient to use as it can be easily put on and taken off. Its round pointed tip ensures precision even when working with small parting amounts. The smooth tip is gentle on the scalp, causing no hair loss or damage.
One of the unique features of the Parting Tool, a premium hair sectioning, is its adjustability to fit most finger sizes. Unlike ordinary tools on the market, the Parting Aid comes with a strap that allows for a secure, comfortable, and customisable fit for both men and women. It holds onto the finger firmly and stays in place during the sectioning and installing process.
To prevent tangling, matting, and shedding:
1. Brush Often: Gently brush extensions before and after use, starting from the ends. Avoid brushing when wet; use fingers to detangle instead.
2. Use the Right Products: Opt for sulfate- and alcohol-free products designed for dry/damaged hair. Look for moisturising ingredients like argan or coconut oil.
3. Moisturise Regularly: Apply lightweight serums or oils weekly from mid-shaft to ends. Avoid overuse to prevent buildup.
4. Hydrate Extensions: Wash less frequently and use sulfate-free conditioners. Rinse with cold water to lock in moisture. For deep hydration, use masks or oil treatments (e.g., coconut oil) overnight, then rinse thoroughly.
5. Check Ingredients: Avoid products with sulfates (SLS, Sodium Lauryl Sulfate) or drying alcohols (Alcohol denat, Ethanol).
By following these steps, you’ll keep extensions soft, manageable, and long-lasting.
Ultimate Hair Extensions Care Guide
Proper care is essential to keep your hair extensions looking smooth, shiny, and long-lasting. Whether you have clip-ins, tape-ins, sew-ins, or keratin bond extensions, follow these tips to maintain their quality.
1. Washing Your Extensions
-
Frequency: Wash every 15-20 wears (or 1-2 weeks for permanent extensions) to prevent drying out.
-
Shampoo: Use a sulfate-free, moisturising shampoo to avoid stripping natural oils.
-
Conditioner: Apply a hydrating conditioner from mid-length to ends, avoiding the roots (especially for tape-ins or bonds).
-
Water Temperature: Use lukewarm water—hot water can weaken bonds and cause tangling.
-
Technique: Gently cleanse in a downward motion—never scrub or twist.
Professional Washing Protocol
Optimal Washing Frequency
-
Clip-ins: Every 8-10 wears
-
Permanent extensions: Every 7-10 days
-
Curly/textured extensions: Every 10-14 days
- Pre-detangle with wide-tooth comb
- Wet with lukewarm water (max 100°F/38°C)
- Apply sulfate-free shampoo to palms first
- Gently massage downward (never circular motions)
- Rinse thoroughly for 2-3 minutes
- Apply conditioner mid-length to ends
- Leave conditioner for 3-5 minutes
- Final rinse with cool water to seal cuticles
2. Drying & Styling
-
Towel Drying: Pat dry with a microfiber towel—avoid rubbing to prevent frizz.
-
Blow-Drying: Use a heat protectant spray and dry on low-medium heat, brushing gently with a wide-tooth comb.
-
Air Drying: If possible, let them air dry to minimise heat damage.
-
Styling Tools: Limit heat styling and always apply heat protectant.
3. Brushing & Detangling
-
Brush Type: Use a boar bristle brush or wide-tooth comb (for curly extensions).
-
Technique: Start from the ends and work your way up to prevent pulling.
-
Frequency: Brush 2-3 times daily to prevent tangles (especially before bed).
4. Sleeping with Extensions
-
Braids or Loose Ponytail: Secure hair in a low braid or loose bun to reduce friction.
-
Silk/Satin Pillowcase: Prevents tangling and breakage.
5. Protecting Extensions Daily
-
Avoid Chlorine & Saltwater: Wear a swim cap or coat hair with conditioner before swimming.
-
Oil & Product Buildup: Avoid heavy oils near bonds/tape to prevent slippage.
-
Tie Up Hair: When exercising, keep hair secured in a loose braid or ponytail.
6. Maintenance for Permanent Extensions
-
Tape-Ins: Get them moved up every 6-8 weeks.
-
Fusion/Keratin Bonds: Maintenance every 10-12 weeks.
-
Sew-Ins: Re-tighten every 6-8 weeks.
-
Nano and Micro Bead: Get them moved up every 6-8 weeks.
7. Storing Clip-In Extensions
-
Clean Before Storing: Wash and dry completely.
-
Keep in a Cool, Dry Place: Store in a satin pouch or storage bag to prevent dust and tangles.
Final Tips:
- Avoid alcohol-based products (dries out hair).
- Schedule regular trims (every 2-3 months) to prevent split ends.
- If bonds feel loose, visit your stylist—don't try to remove them yourself.
By following these steps, your extensions will stay soft, tangle-free, and beautiful for months!
Dying Hair Extensions Disclaimer.
Results may vary with different brands and types of hair extensions and dyes. We cannot be held responsible for any issues that may occur during or after the dying/toning process as the reaction and application methods may vary. To ensure desired results, it is recommended to test the dye/toner on a small piece of hair before fully committing to the process.
Dying/toning can be a drastic change as the chemicals involved can negatively affect the texture, quality, and longevity of the extensions. The product may experience increased dryness, shedding, tangling, and breakage. Our hair extensions undergo a rigorous dying and bleaching process to achieve their stunning shades.
Warranty Disclaimer – Professional Installation Required for Coverage
Please be aware that our warranty only covers hair extensions that have been installed by a professional hairdresser. Any hair extensions that have not been installed by a qualified professional will not be eligible for warranty coverage. This is to ensure the highest standards of quality and care for your hair extensions. We strongly recommend seeking the services of an experienced hairdresser for proper installation and to maintain the integrity of your hair extensions.